About a month ago, Stephanie from All About Ami released her pattern for Cotton – a toy sheep from the Japanese Animation Oblivion Island : Haruka and the Magic Mirror. Though I hadn’t (and still haven’t!) seen the movie, I was excited to work on this project, simply because it was adorable and I love the challenge of putting together amigurumi.
BUYING MATERIALS
My biggest initial challenge in starting this project was picking appropriate yarn as the ones suggested by Stephanie are not available in Australia. The beige/tan of Cotton’s arms were easily substituted with a regular acrylic 8 ply yarn – but the white for his head and body were more difficult to determine. After comparing numerous balls in the shop to the picture of the yarn Stephanie used for her Cotton, I settled on “Babinda” by Panda in China White (purchased from my local Spotlight store).
I ended up using about 2 and a half 50g balls. While it wasn’t as fluffy as the yarn that Stephanie used, it was a reasonable substitute. My only qualm with it was that the third ball I used (perhaps it was faulty?) was inconsistent in thickness. It would vary between being almost thread thin to chunky yarn thick. Thankfully I only had to use this faulty yarn for a small part of Cotton, so the holes it caused weren’t too obvious or frequent.
I realised after purchasing my yarn and buttons that I had picked shades darker than the original Cotton (as I had used a terrible phone photo of my computer screen as a reference for buying my supplies!) so I have just convinced myself that this Cotton has a Australian tan. 😉
FOLLOWING THE PATTERN
Stephanie’s patterns are always well written and easy to follow. However, I was so preoccupied with picking up the stitches on Cotton’s face to join the rest of his head I forgot to check that I had actually crocheted proper “front post single crochet stitches” as required in R2 of the Head. This resulted in Cotton’s head looking like this:
Though there wasn’t anything technically “wrong” with how I had connected Cotton’s face and head, it didn’t have the lovely finish “front post single crochet stitch” would have given it. I contemplated unravelling Cotton’s head, but then my mum a less painful (frogging crochet is never fun – especially when you’ve put hours into it!) solution of just picking up stitches and single crocheting around Cotton’s face.
The faux “front post single crochet stitches” did the trick and covered up my mistake! The rest of the pattern came together without trouble – and then came assembling. Having now made many Amigurumi I’ve learned that it’s almost just as important to take time assembling pieces together as it is crocheting them. The way in which you attach limbs can change the overall look of your amigurumi. After all the work of crafting each piece – it pays to take your time in assembling each piece together!
THE FINISHED PROJECT
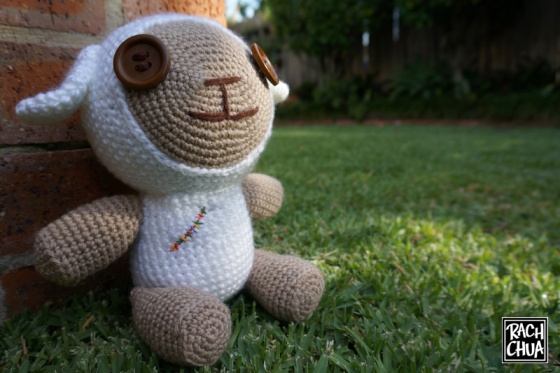
And this was/is my finished Cotton!
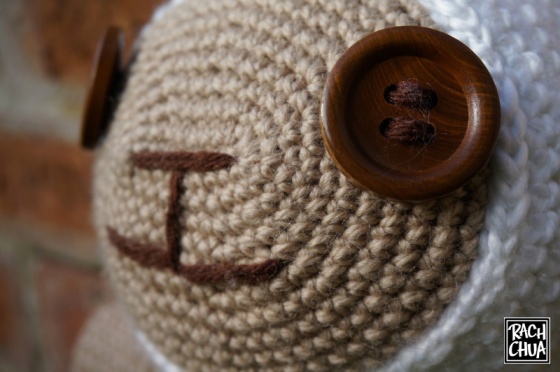
I loved the different details on Cotton. For his eyes I used wooden Beutron buttons measuring about 3.5cm in diameter. It already had 4 holes, so I didn’t add any holes as Stephanie did with her Cotton (though this meant that the thread didn’t stretch as far over each button).
For his scar (I wondered whether to omit this and make Cotton just a regular sheep, but figured I’d eventually watch the movie and would want him to look close to his movie counterpart) I used scraps of embroidery thread that had been left over from other projects. It was great to find a use for those scraps!
For Cotton’s tag I cheekily added my own tag. I’ve been dreaming/talking about starting my own online shop for as long as I can remember. I’ve been pretty slack with putting this into motion (though I mean to finally commit to this when I come back from my upcoming trip!) but in one of my past spurs of inspiration/motivation I did get some fabric tags made. I by no means mean to sell Cotton (he is too lovely – and besides, he is bound by copyright!) – I just thought it’d be cute to tag him with my own name. 🙂
And finally, a shot of Cotton’s little tail as it keeps getting missed in almost all the pictures I’ve taken of him!
And a few more shots of Cotton..!
So, in short, another great amigurumi pattern from Stephanie at All About Ami! As always, if you’re after quality (and free!) amigurumi patterns, I highly recommend you check out her blog! 🙂


